Creating a Map - Step 1: Setting Up the Base
In this part, I will tell you about the very first stage of creating a map - setting up the base. Creating objects and events will be covered in the following parts. Here, I will explain how to create an empty map, make a copy of an existing map, and import individual objects from other maps into yours. There are two ways to create a map: from scratch or by copying. Creating a map can be a complex process, and I try to simplify it.
Copying an existing map can be useful in the following cases:
- You want to create a different version of an existing map with different descriptions, emphasis, or some changed objects. Modifying a copy is usually much easier than starting from scratch.
- You want to create a map of other events within a close time interval. For example, after creating a map of the "Russian Civil War," you may want to create a map of "World War I." Most background objects such as countries, cities, and railways will be the same. There's no need to draw them again from scratch. You can copy the existing map, remove what's unnecessary, add new elements, and save it under a different name.
- You simply want to experiment on a ready-made map. You can play around with your separate copy as much as you like. In addition to copying the entire map, you can also copy individual objects from one map to another. For example, rivers and mountains have changed little throughout human history (although there are exceptions). It's unnecessary to redraw them for each map. You can import them from another map. I will explain how to do it below.
Creating a New Map
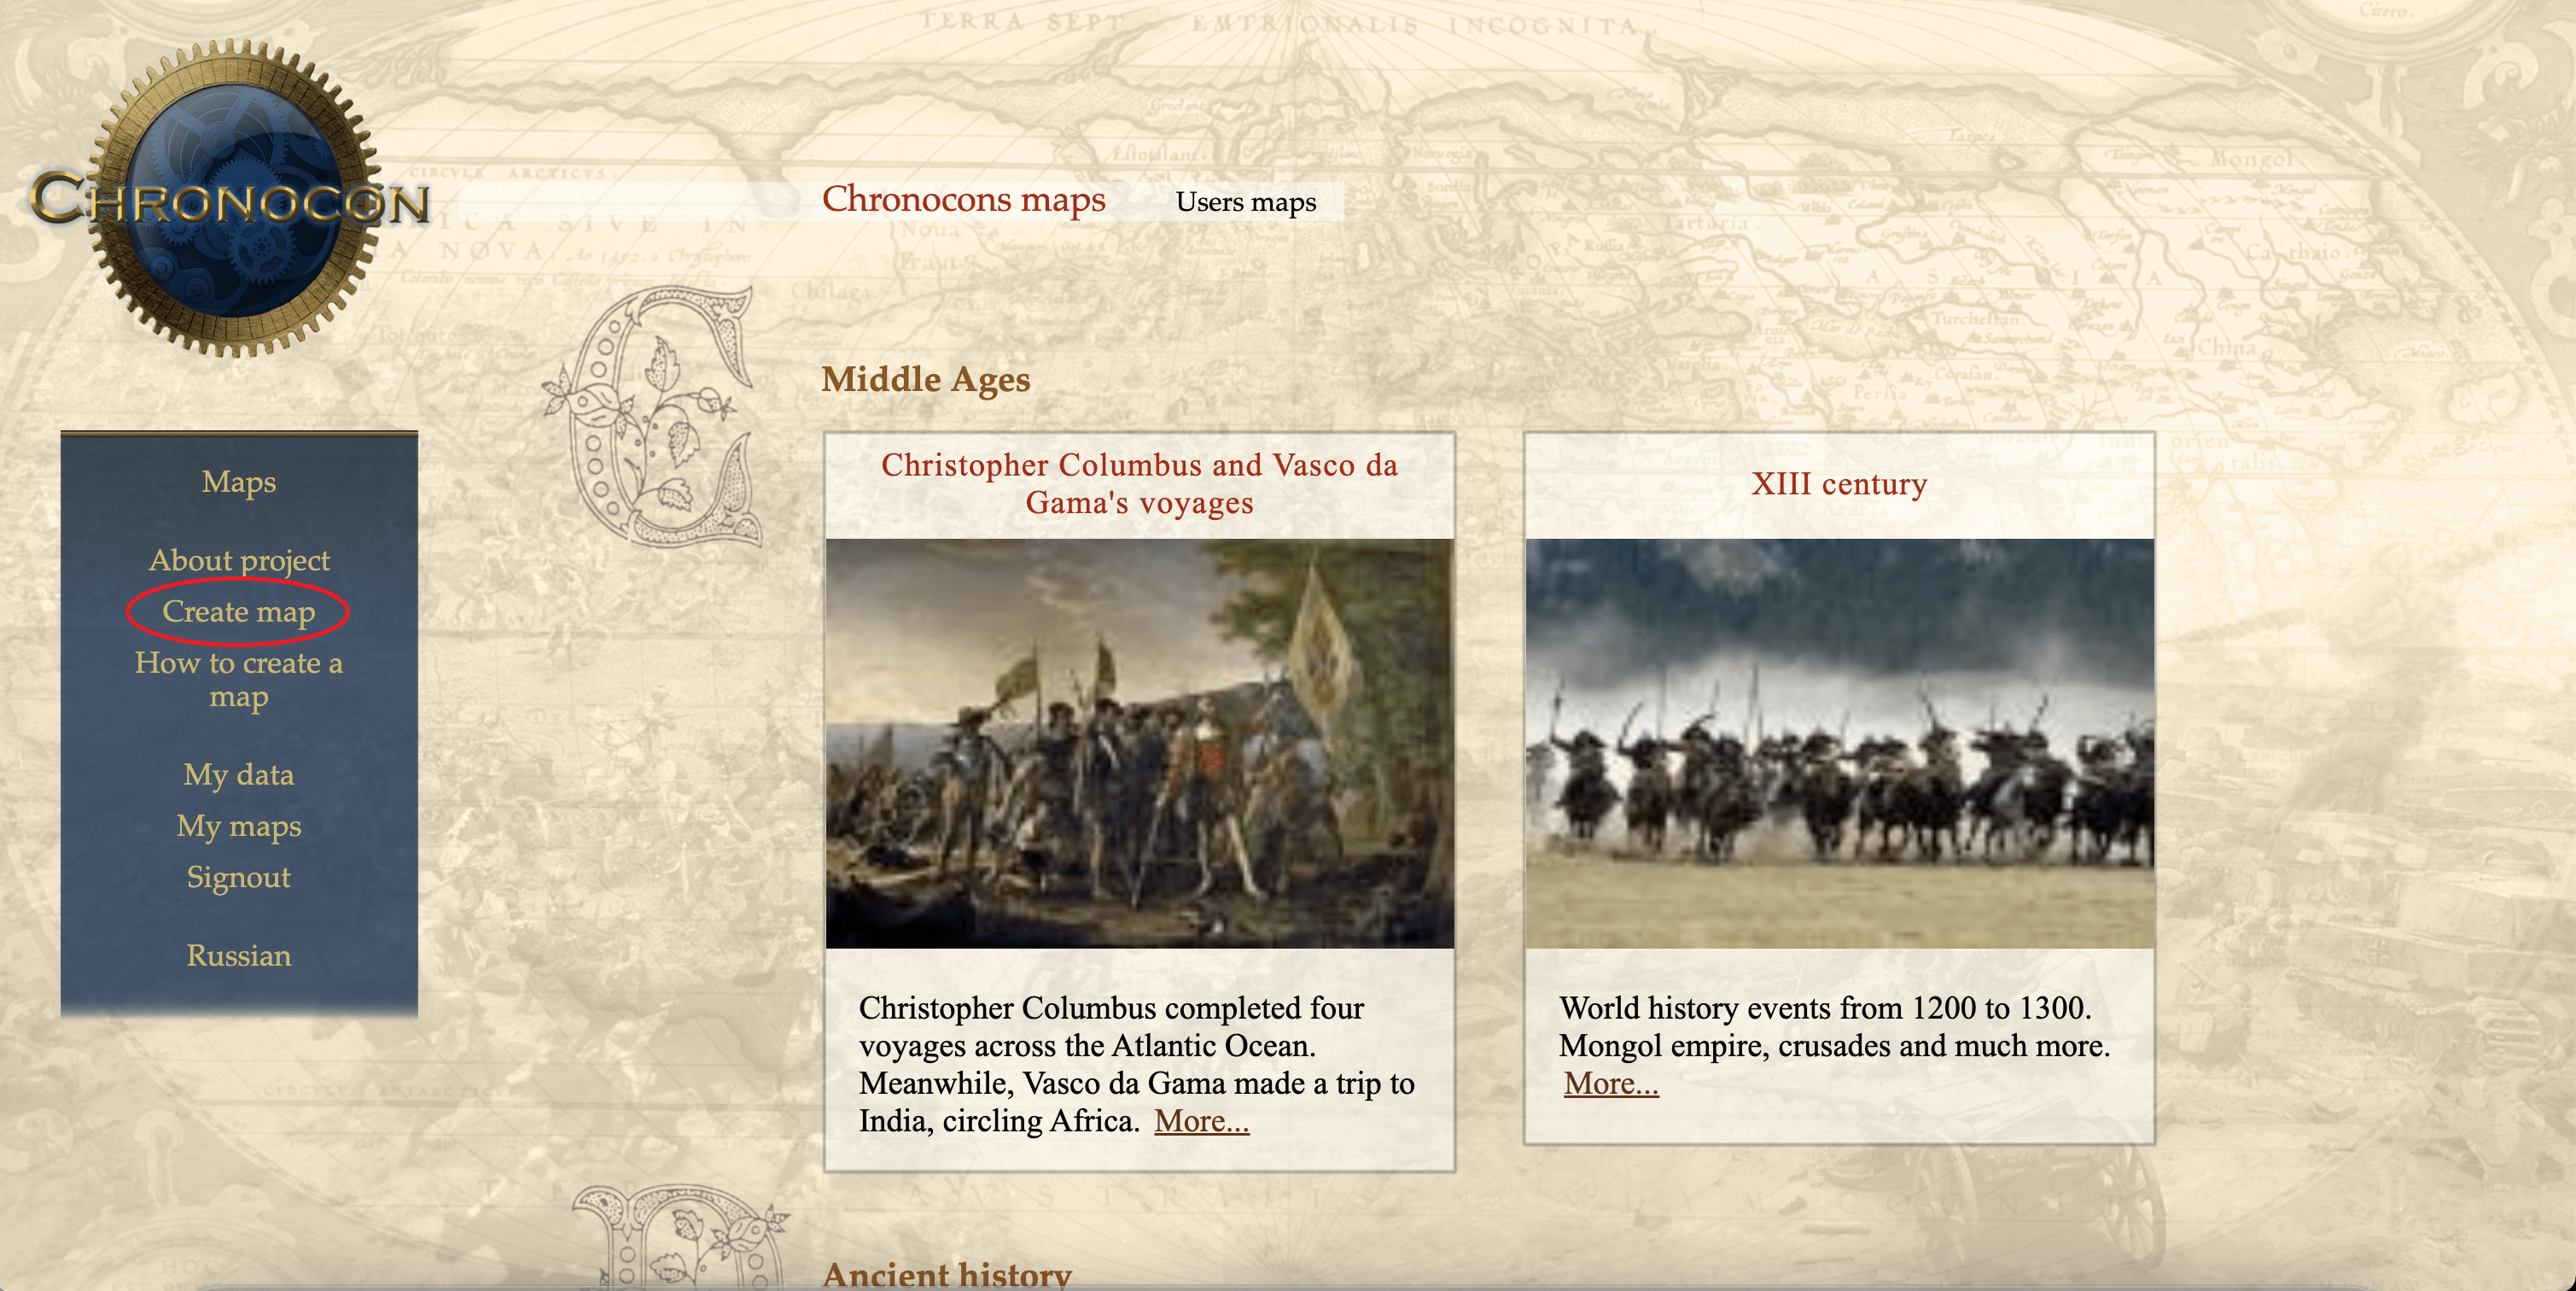
Let's start with creating a map "from scratch." To create a map from scratch, click on the "Create Map" button on the main page and fill in the necessary fields:

- Map title: This one is self-explanatory.
- Description and image for the map list on the main page: Your map won't be displayed in the general map list on the main page until the "Published" checkbox is selected in the settings (which I will explain below).
- Time step and map time frame (start date and end date): Time on the map is discrete. You can choose the minimum step - day, month, or year - depending on how detailed you want to describe the events. The step applies to the entire map, and currently, it's not possible to have different levels of detail for different parts of the map. Unlike other parameters, the time step cannot be changed after the map is created.
- Map type: Satellite imagery or modern map (with modern countries and cities). Satellite imagery is more suitable for describing historical events, while a modern map is more appropriate for describing present-day events. Users can always switch between map types (the toggle switch in the top right corner of the map).
- Unknown area: If not the entire Earth's surface was known during the chosen period of human history, you can enable this setting. The map will be covered by a black area, with a bright window in the middle that can be customized. You can configure the window to change dynamically as the events on the map progress (this can be the basis for maps of Great Geographical Discoveries). Users can disable this area (the icon in the bottom right corner of the map).
- Editors: If you want to collaborate on filling the map, enter the usernames of the users you want to grant editing access to (they must be registered). The map will appear in their "My Maps" section.
During the map creation process, the system will prompt you to log in or register (if you haven't registered yet).
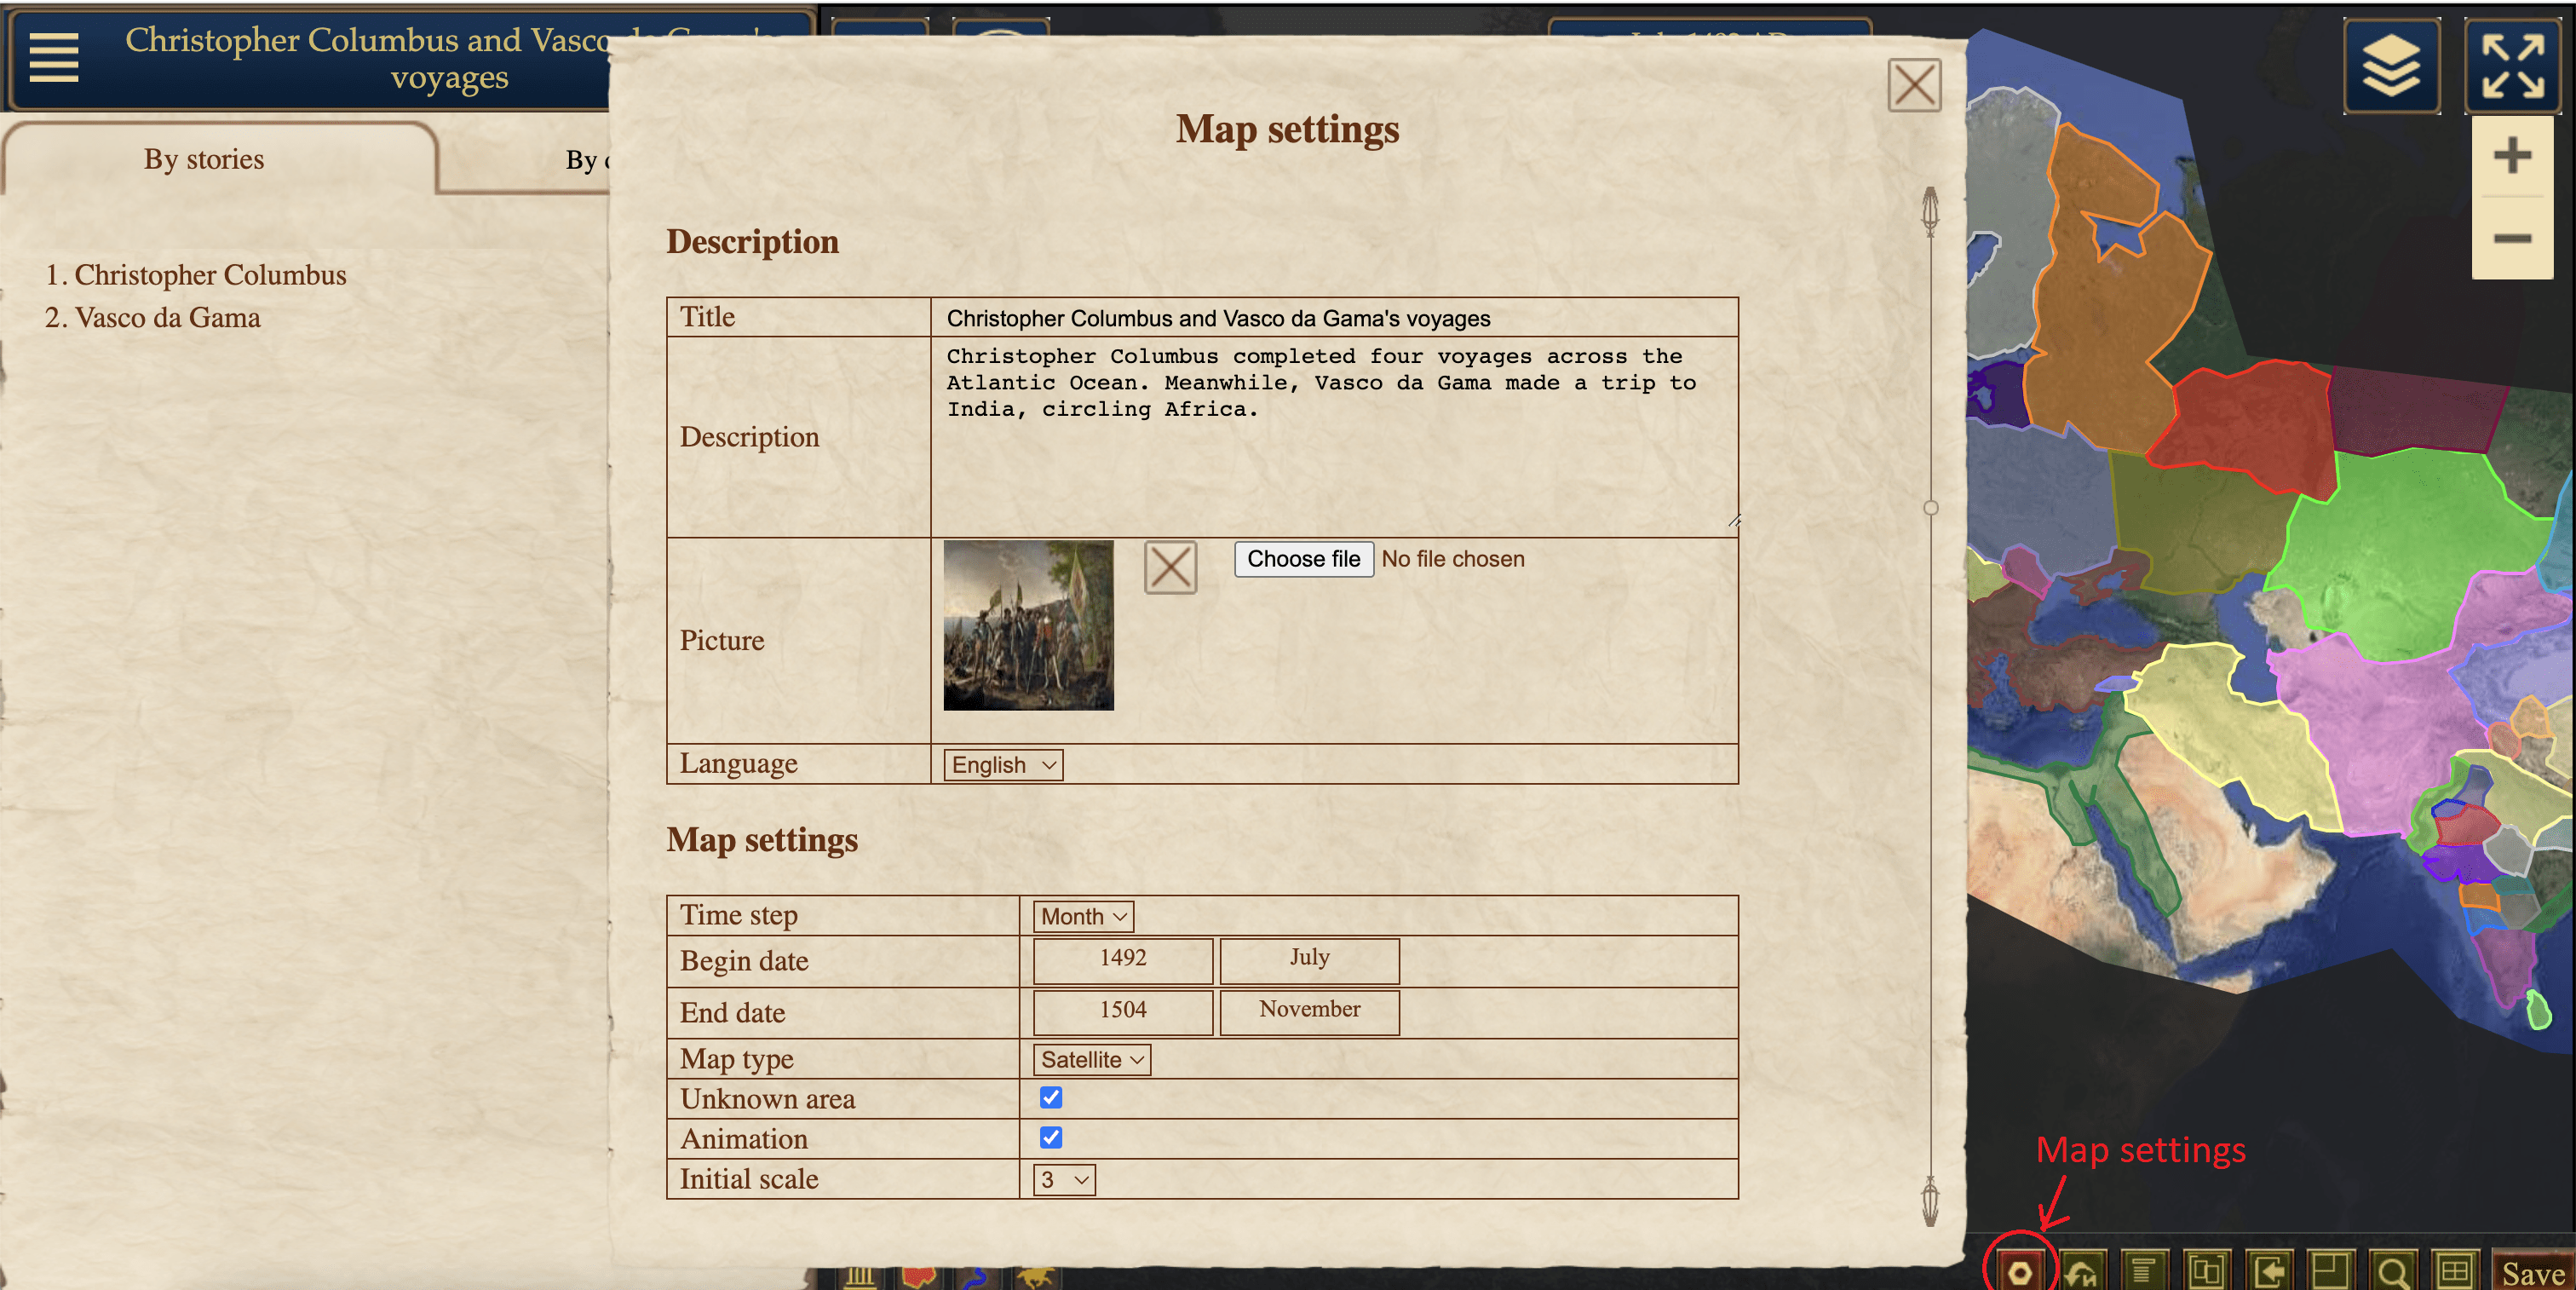
The link to the map will appear in the "My Maps" section. All parameters can be modified in the "Map Settings" section (except the time step).

In addition, in this section, you can set the following options:
- "Published": After enabling this option, the map will appear in the list on the main page and will be accessible to users.
- "Editing Open": Any registered user, not just the designated editors, can edit the map. The map's revision history is preserved, allowing you to revert to a previous version. Permission settings, map deletion, and deletion of the latest version are only available to editors.
Copying a Map
Now, let me explain how to copy an existing map. To do this, follow these steps:
- Go to the desired map.
- Switch to the editing mode (click the "Edit" button in the bottom right corner).
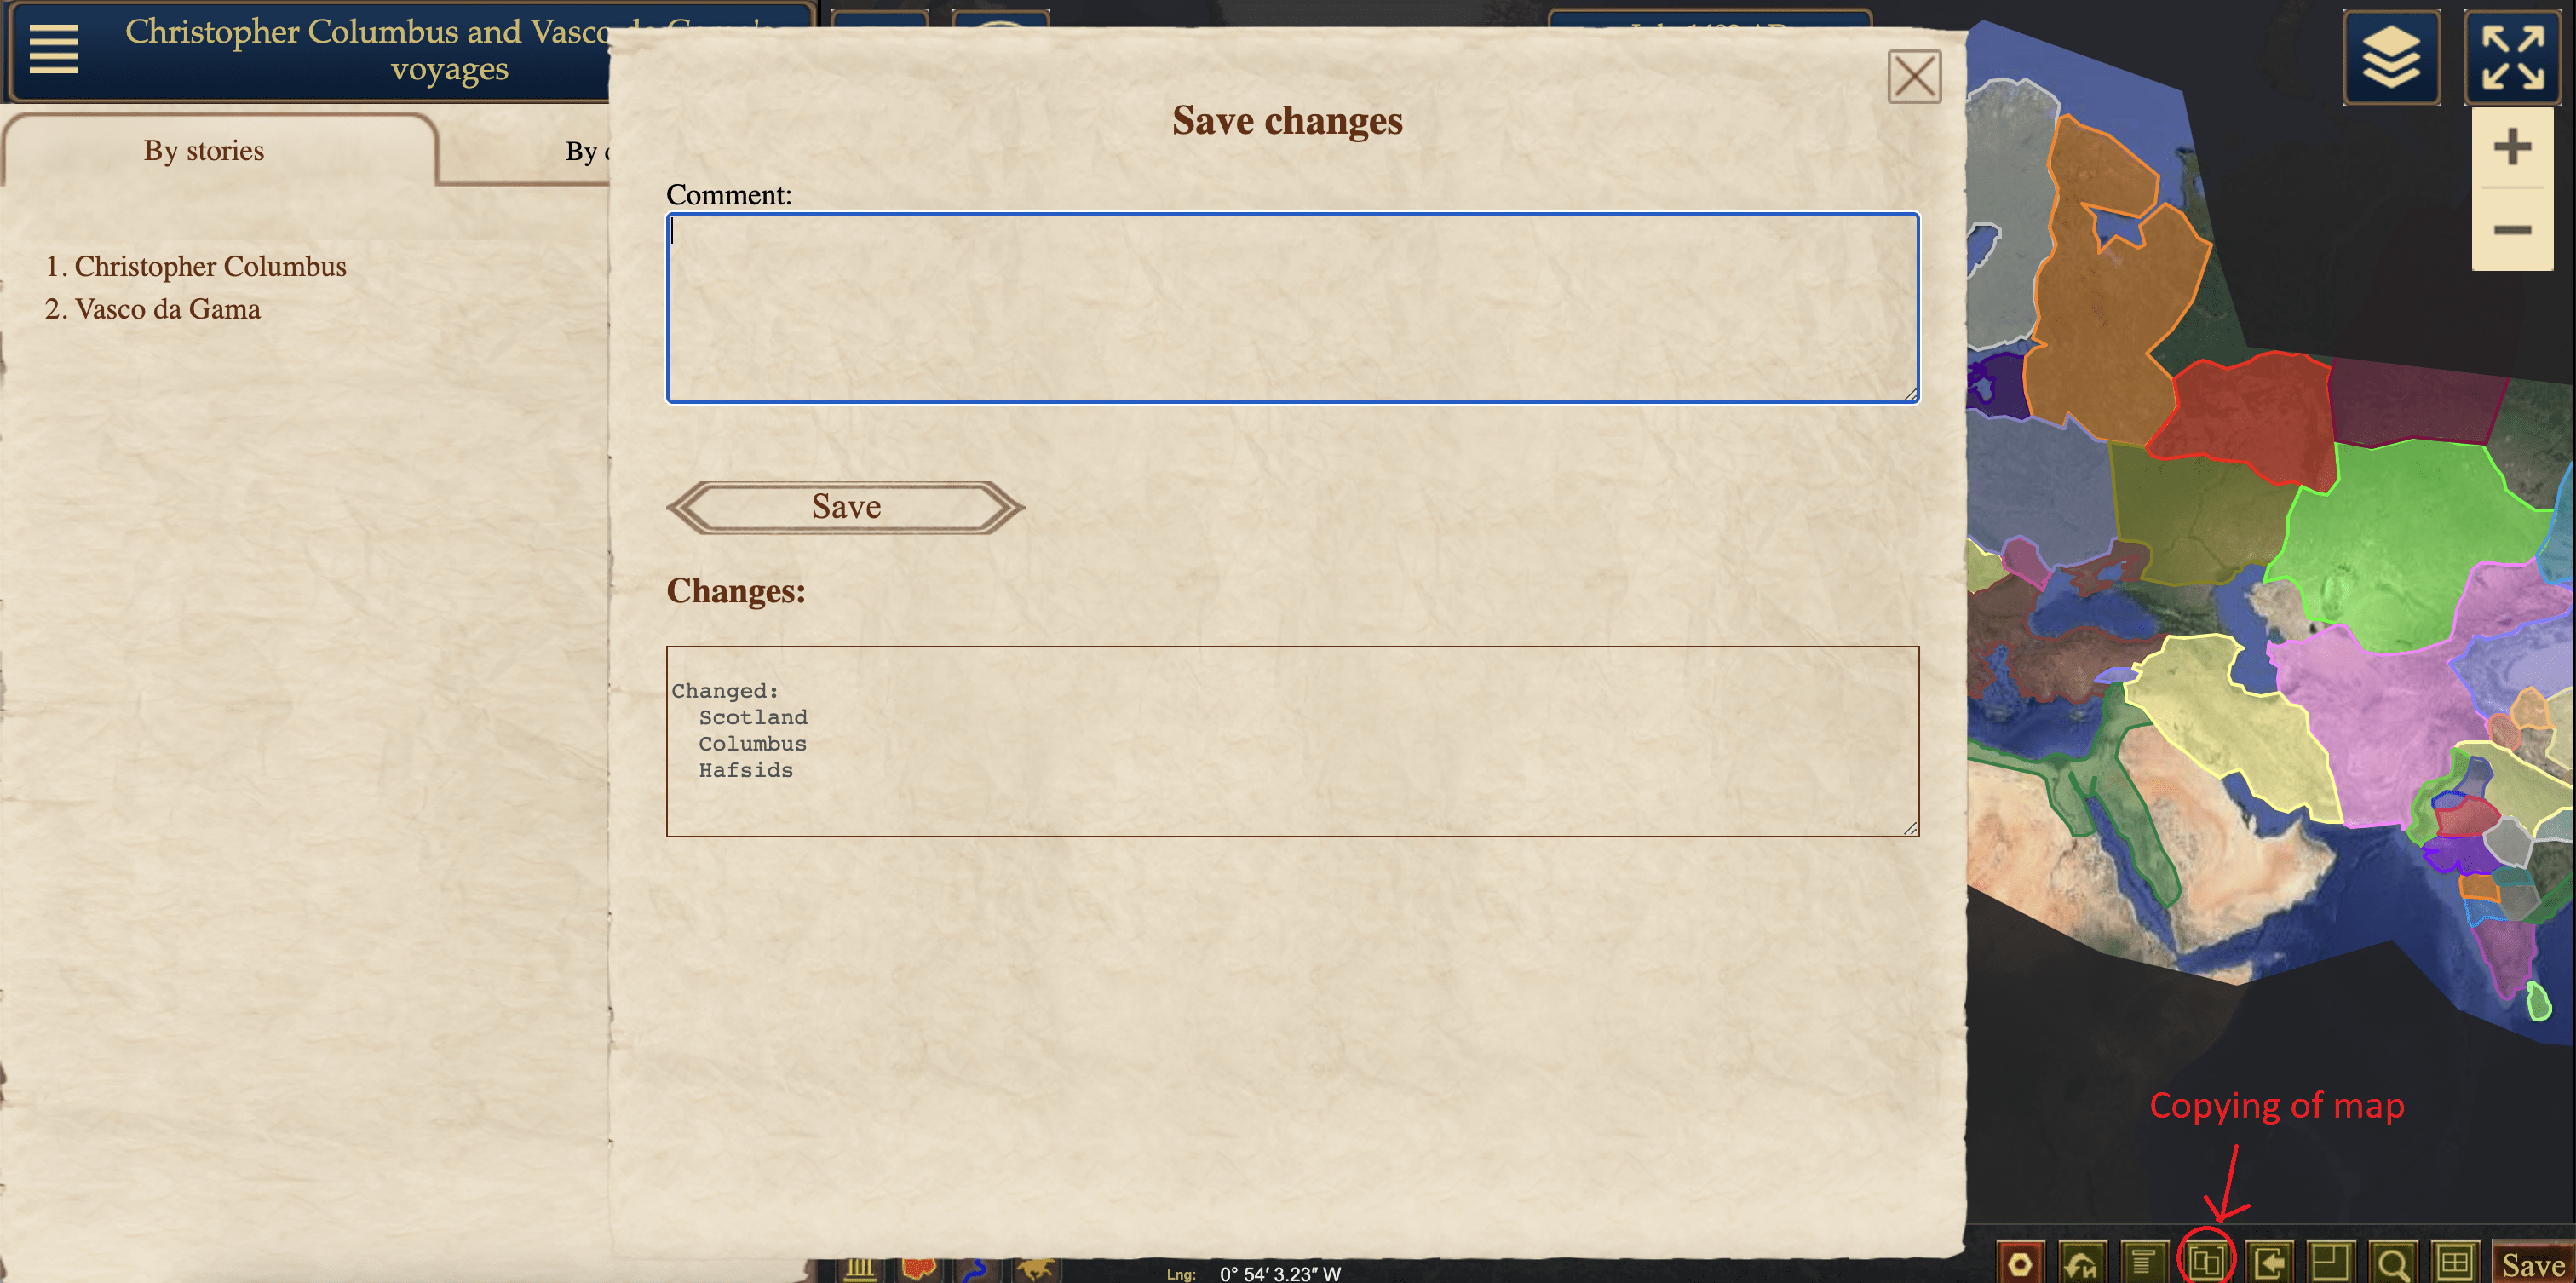
- Click on the "Save Copy" icon on the bottom panel.
- Log in or register (if you haven't registered yet).
- Enter the name for the new map and click "Save".
An independent copy of the map will be created, and only you will be able to edit it. Editing permissions can also be adjusted in the "Map Settings".

Importing Objects
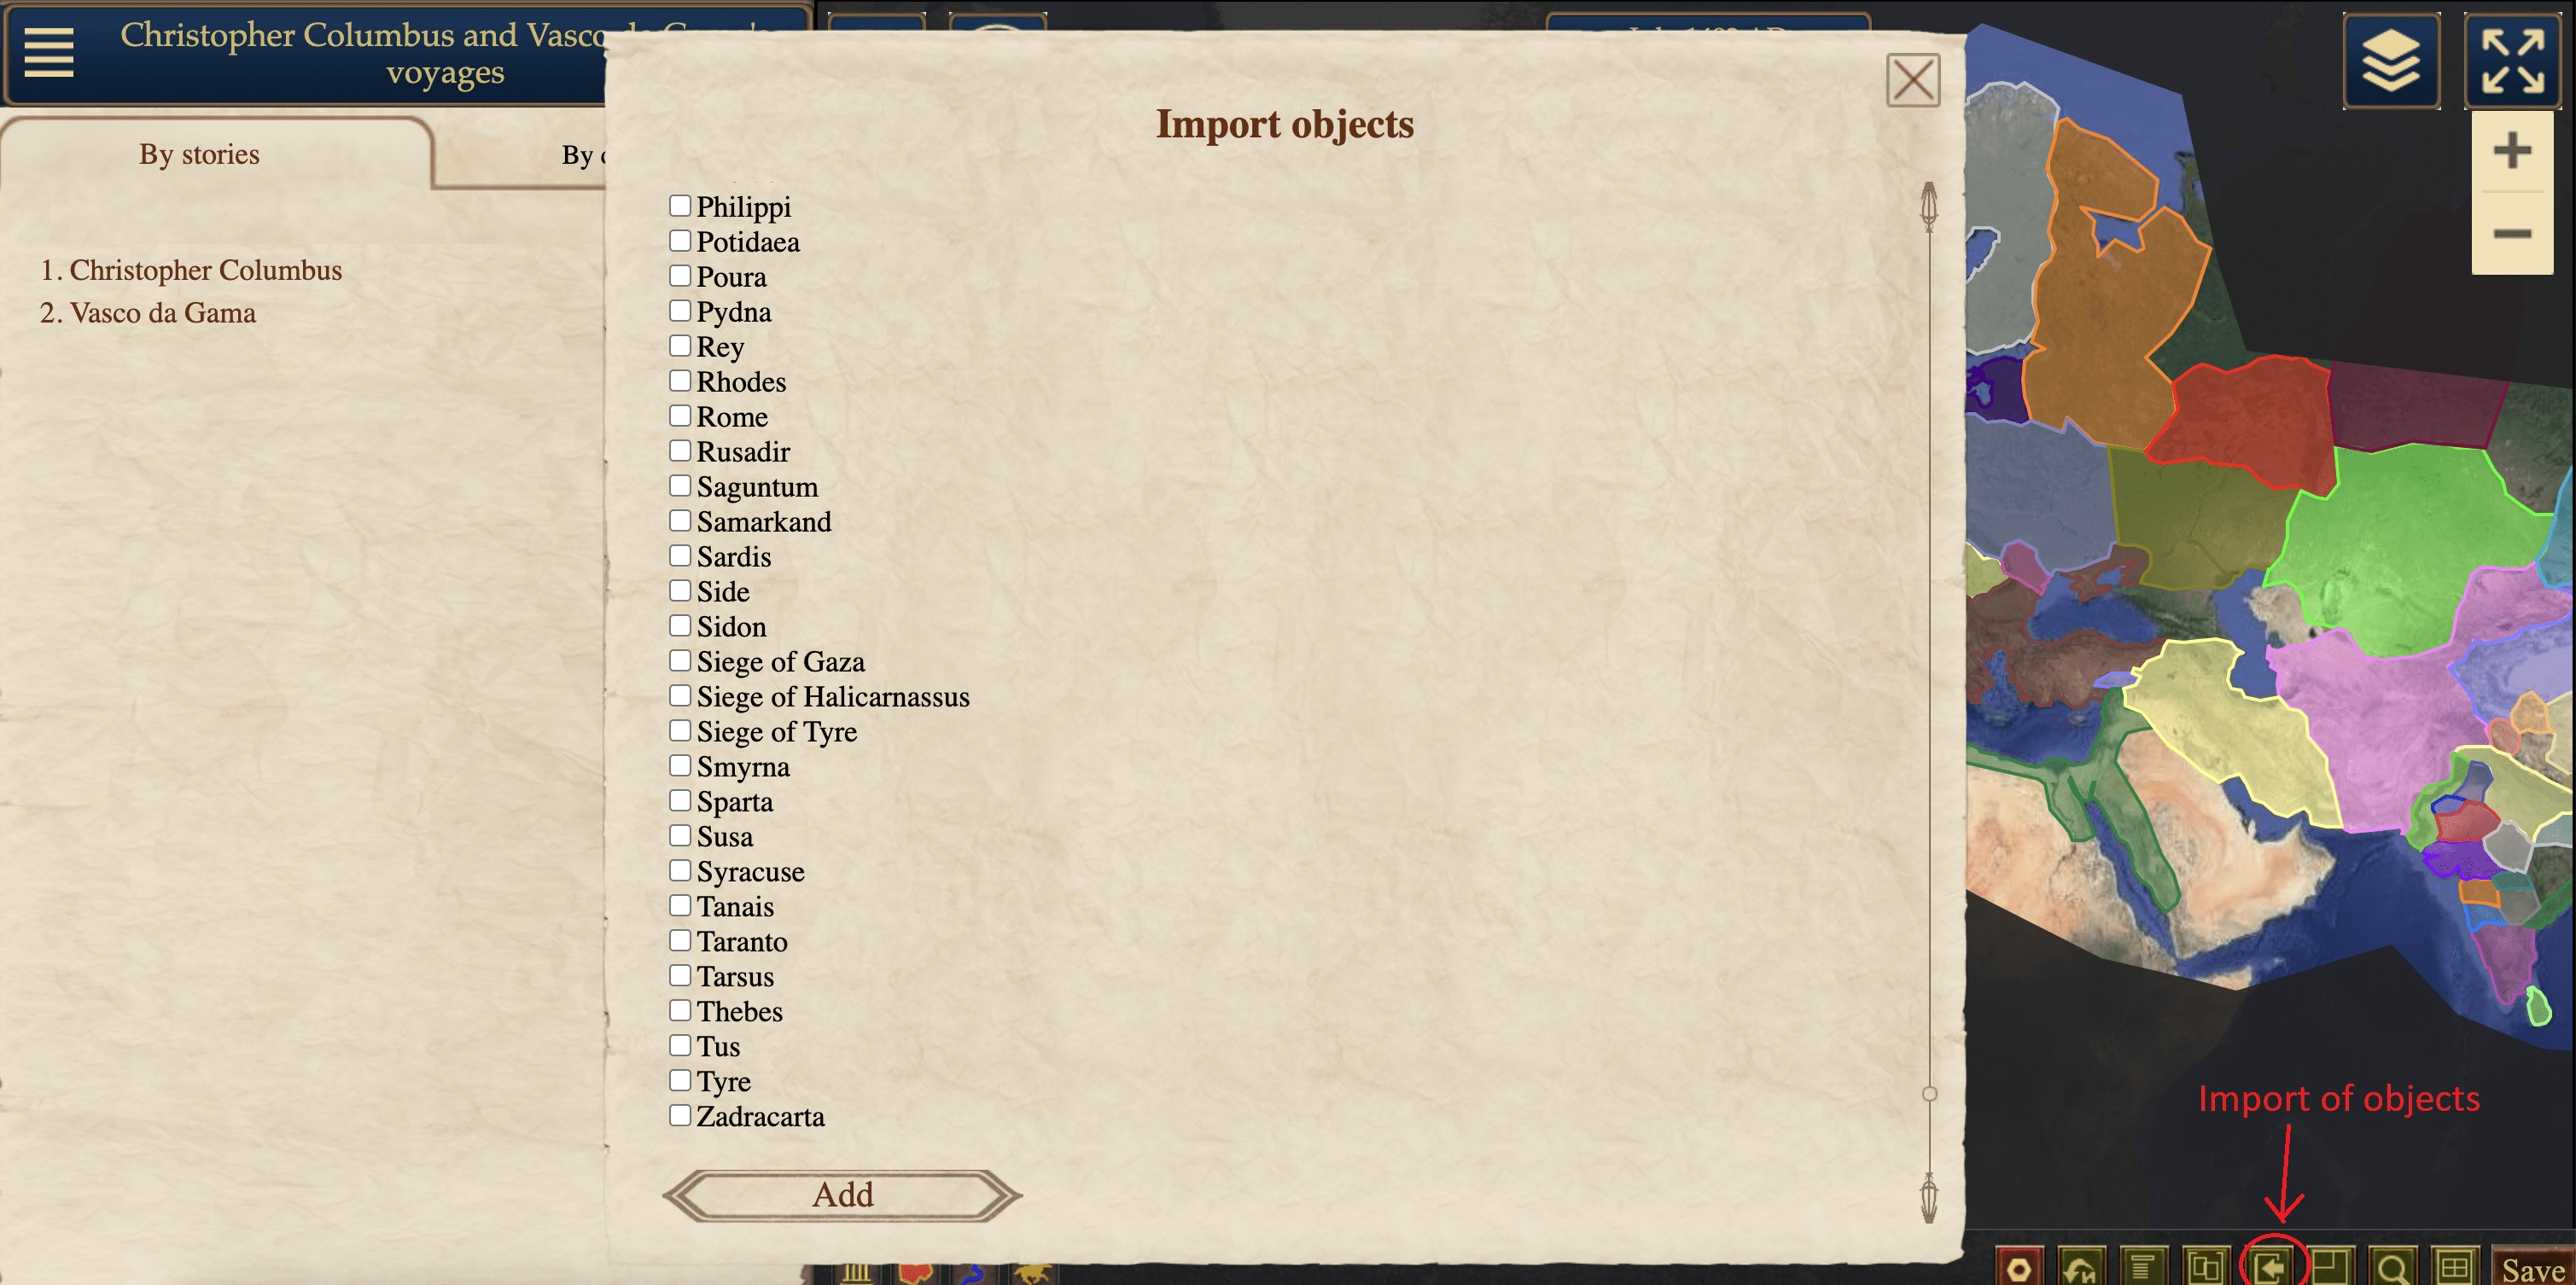
"Object Import" allows you to copy individual objects from other maps, so you don't have to create them from scratch each time. To import objects, follow these steps:
- Go to your map.
- Switch to the editing mode (click the "Edit" button in the bottom right corner).
- Click on the "Import Objects" icon on the bottom panel.
- Select one of the available maps and click "Show". The list of objects from that map will be displayed.
- Select the desired objects using checkboxes and click the "Add" button below the list.
- Copies of the objects will be added to your map. Afterward, don't forget to save your map to the server.

Next time, I will explain how to add your own objects to the map.


